Don't Be A Pirate

My Blinkies

Add Me On Facebook
Protected


Blogs I Stalk


Awards :-)


Find Me At
Favorite Stamps


Tuesday, June 21, 2011
♥Happy Independence Day PTU♥
**This tutorial was written & posted by DitzyDezigns on June 21st 2011**
***Any resemblance to any other tutorial is purely coincidental & completely unintentional!!***
Here is what we will be making :

Supplies Needed :
Paint Shop Pro X2 (Any version should work)
Animation Shop
Scrapkit - USA Girl By Tamie @ Addictive Pleasures
Plugins Used :
Eye Candy 5 Impact - Glass (Optional)
Eye Candy 4 Gradient Glow (Optional)
Elements Used :
Stars 3 & 4
Ribbon2
Flag
Fireworks
Text
(The settings you will see below on my screen shots & those that I have typed out are of my own personal preference, you by no means have to use exact settings I used, but you are more than welcome too. You can also change any settings that you would like to suit your personal preference.)
Lets Begin :
Start by opening a new 800 X 650 white canvas. (Don't worry we will crop it later.)
Activate your text tool, set your font, size & color.
I used :
Font : DaFunk2
Size : 175
Background Color : #9b0202
Foreground Color : Set to nul.
Click on your canvas, this will open your text box, type out the name you would like to use.
Now click Apply.
Now center your name on your canvas.
Go to your layers pallet, right click on your name layer, then click Convert To Raster Layer.
Then go to Effects - click Plugins - then click Eye Candy 4 - then click Gradient Glow.
The settings below are my own personal preference. You are welcome to use them or your own :
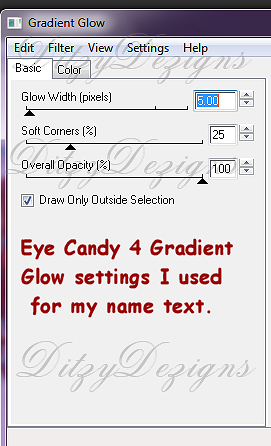
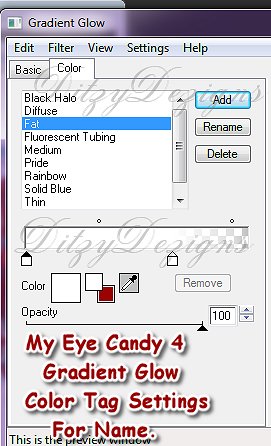
Then click Ok.
Now go to Effects - click 3D Effects - then click Drop Shadow from the slide out menu. Again the settings below are my own personal preference, you may use them or your own :
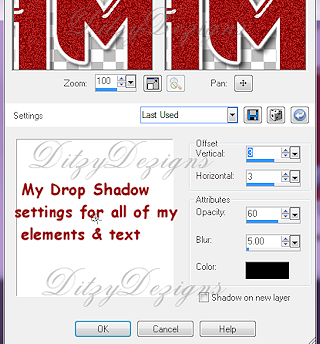
Then click Ok.
Now activate your Magic Wand tool, then click inside each letter of your name. Once all your letters are selected (they will have "marching ants" around them) go to Effects - click Plugins - then click Eye Candy 5 Impact - then click Glass.
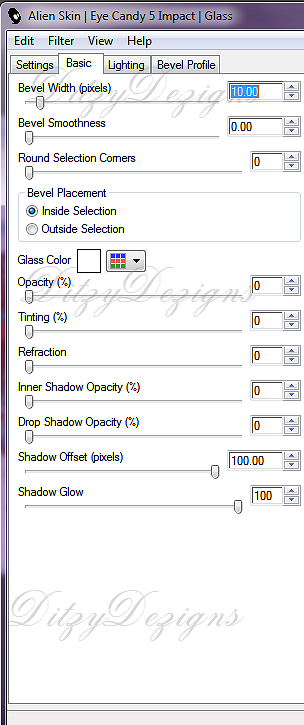
Click Ok.
Now keeping your letters selected, go to Adjust, click Add/Remove Noise, then click Add Noise. Set to your liking then click Ok.
(I used Uniform, 40, Monochrome box is checked.)
Now go to Selections & click Select None.
Now open your Fireworks element - Copy & paste it as a new layer onto your canvas, then re-size it to 50%.
(To re-size something, you can either go to Image & click Re-size, OR you can use your Shift & s key at the same time & that will open your re-size menu.Below is a screen shot of where to change your settings, if you are new to PSP :-)
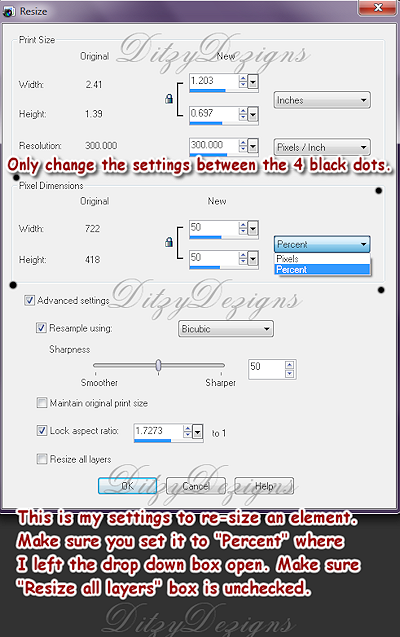
Then click Ok.
Now use your move tool & position your Fireworks element to the left side of your canvas.
Once happy with the placement, go to your layers pallet, right click on your Fireworks layer, then click Duplicate. Again use your move tool to position your duplicated Firework element.
Now continue to duplicate your Firework layer & position each one with your move tool until you have enough Fireworks elements to cover the full width of your name.
Now in your layers pallet , move your Name layer above ALL of your Fireworks layers.
Still in your layers pallet, right click on your very top Fireworks layer, then click Merge, then from the slide out menu click Merge Down.
Continue to merge down each Fireworks layer until they all become 1.
Once you have 1 merged Fireworks layer, right click on that merged Fireworks layer & click Duplicate.
Now right click on your Duplicated merged Fireworks layer & click Merge - then click Merge Down.
(By doing this it makes the Fireworks element on your canvas a bit darker so that the glitter animation will show up better:-)
Now right click on your newly merged Fireworks layer, then click Duplicate. Now on your duplicated Fireworks layer, & click Duplicate again. Now you should have 3 Fireworks layers total.
Now double click on the bottom Fireworks layer, & rename it F1. Then double click on the 2nd Fireworks layer change the name to F2, then double click on the 3rd Fireworks layer and rename it F3.
Now you should see an eye next to each of your layers, so on your F2 & F3 layer, click that eye to hide those two layers.
Still in your layers pallet, click on your F1 layer, go to Adjust, click Add/Remove Noise, then click Add Noise from the slide out menu. Set your settings to :
Uniform
30
Monochrome box checked.
Click Ok.
Go back to your layers pallet, click on your F2 layer, then click the eye next to your F2 layer, this will unhide that layer, go to Adjust, click Add/Remove Noise, then click Add Noise,
Uniform
35
Monochrome box is checked.
Click Ok.
Now go back to your layers pallet,
click on your F3 layer & click the eye next to your F3 layer, then go to Adjust, click Add/Remove Noise, then click Add Noise
Uniform
40
Monochrome box checked.
Click Ok.
Now click the eye next to both your F2 & F3 layers, this way when it is time to animated you are all ready. :-)
Now click on your top layer in your layers pallet -
Open your Flag layer - Copy & paste it as a new layer onto your canvas, then re-size it to 40%. (Use the same re-size settings as you did above just instead of it being 50 you will change it to 40%.)
Now position your Flag element so that it is at the end of your name.
(I used my last letter)
Then in your layers pallet, move your Flag layer down so that it is directly below your Name layer.
(To move a layer up or down, left click & hold down while dragging the layer up or down.)
Still on your Flag layer go to Adjust, click Sharpness, then click Sharpen.
Apply a drop shadow. (Same settings as you used on your name.)
Now click on your top layer in your layers pallet -
Open your Ribbon 2 element - Copy & paste it as a new layer onto your canvas, then re-size it to 70%.
Now use your move tool to position your Ribbon2 element to the left end of your name. I placed my Ribbon2 element on the outside edge of the first letter in the name.
Now go to Adjust, click Sharpness, then click Sharpen.
Now apply a drop shadow to your Ribbon2 element. (Same settings as before)
Open your Text element - Copy & paste it as a new layer onto your canvas, then re-size it to 80%. Using your move tool, position your Text element under your name.
Go Adjust, click Sharpness, then click Sharpen.
Now apply a drop shadow to your Text element. (Same settings as before.)
Go to your layers pallet & move your Text layer below your Ribbon 2 layer.
Open your Star 3 element - Copy & paste it as a new layer onto your canvas, then re-size it to 30%. Now using your move tool position your Star 3 element where you would like it. (There is no set place, just whatever your preference is. :-)
Once you are happy with the placement of your Star 3 element - go to Effects - click Eye Candy 4 then click Gradient Glow. The settings below will show that the only change I made compared to the settings we used on the name is the Glow Width. I changed it from 5 to 3.
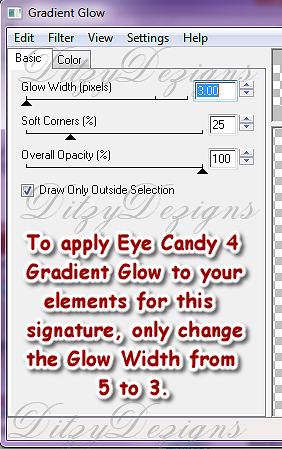
Click Ok.
Now go to Effects, click 3D Effects - then click Drop Shadow & apply the same settings you have used thus far.
Now go to your layers pallet, right click on your Star 3 layer, then click Duplicate. Position your duplicated Star 3 element using your move tool.
Continue to duplicate your Star 3 layer until you have the desired amount of red stars on your signature.
Open your Star 4 element - follow the exact same steps you used for your Star 3 element.
Now activate your Text Tool again, set your font , color & size that you would like to use to add your phrase or quote.
I used :
Cynthia Script ES
Size : 40 Pixels
Background Color : #000c5c
Foreground Color : Set to nul.
Now click on your canvas, this will open your text box, then type out the phrase, quote or saying you would like.
Then click Apply.
Now go to your layers pallet, right click on your phrase layer, then click Convert To Raster Layer.
Then go to Effects - click Plugins - then click Eye Candy 4 - then click Gradient Glow.
For these settings I used the exact same settings as I did for my Star 3 & Star 4 elements. You can do the same OR you can change them up. :-)
Now go to Effects - click 3D Effects - then click Drop Shadow. Use the same settings you used for your name text.
Now you will want to add your copyright & or your credit information.
Now activate your crop tool, then crop off any access canvas that you did not use.
Now open your Animation Shop.
Go back to your PSP
In your layers pallet, click on your F1 layer. (Make sure the eye next to your F2 & F3 layers is clicked so they eye has the red circle with the line threw it showing.)
Go to Edit, click Copy Special ,then click Copy Merged from the slide out menu.
Go to your Animation Shop - right click on your grey work area ,then click Paste As New Animation.
Go back to your PSP -
Now in your layers pallet, click on your F2 layer, also click the eye next to your F2 layer to unhide it. Then click the eye next to your F1 layer to hide that layer.
Go to Edit, click Copy Special, then click Copy Merged.
Go to your Animation Shop -
Right click in the 1st frame you just put there, now click Paste - then click After Current Frame.
Go back to your PSP -
Click on your F3 layer, then click the eye next to your F3 layer to unhide it, also click the eye next to your F2 layer to hide it.
Go to Edit, click Copy Special , then click Copy Merged.
Go to your Animation Shop -
Right click in your 2nd frame you just put there, then click Paste, then click After Current Frame.
Now you will want to view your animation. To do that go to the top of your Animation Shop on the right side & click the film strip icon. It is the 2nd icon in from the right.
If you are happy with your completed signature, you may want to re-size it prior to saving it.
If you want to re-size it in Animation Shop, on your keyboard press & hold your Shift key & then tap your s key. This will open your Re-size menu for Animation Shop.
Then you change the Pixel Size to your desired size. You should only have to change the Width size & your Height size will adjust accordingly.
The settings in the screen shot below are those of my preference for this signature for posting it on my blog.
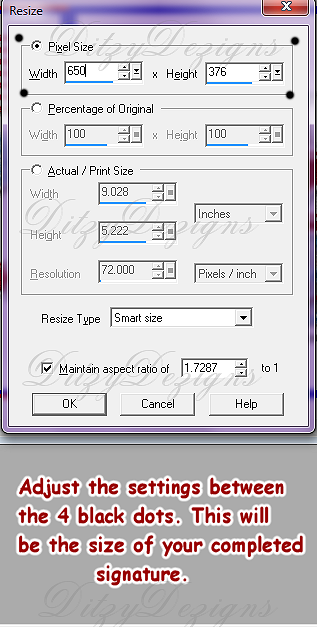
Click Ok.
Now go to File, click Save As, make sure when your window opens you are set to Gif, then name your signature, & save it where you would like on your computer.
You have completed this tutorial!! Thanks for trying my tutorial!!♥
Subscribe to:
Post Comments (Atom)
About Me
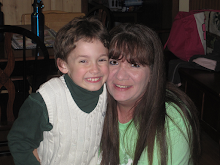
- DitzyDezigns
- New York, United States
- Hiya Everyone! My name is Ronney, I have 3 wonderful teenagers, and have been married to my husband for 20 years. I LOVE to design signatures, tags & avatars, I design with PSP, and have been designing for over 2 1/2 years. I will be not only designing signatures, tags & avatars but will also be writing & posting tutorials as well. I will also be making some templates to share with you all as well. So I hope you enjoy and can use everything I have available on my blog :-) If you ever try any of my tutorials,please send me your completed designs and I would love to showcase it here on my blog!
♥I CT For♥


Blog Hop

Today's Date

Favorite Stores
♥Forums♥


My Pixels


♥My Avatars♥


0 comments:
Post a Comment