Don't Be A Pirate

My Blinkies

Add Me On Facebook
Protected


Blogs I Stalk


Awards :-)


Find Me At

Favorite Stamps


Monday, August 22, 2011
Pirate Boy PTU
**This tutorials was written & posted by DitzyDezigns on August 22nd 2011**
***Any resemblance to any other tutorials is purely coincidental & completely unintentional!!***
Here is what we will be making :

Supplies Needed :
Paint Shop Pro X2 (Any version should work)
Animation Shop
Scrapkit - Pirate Boy By Peekaboo Land
Mask Of Choice
Plugins Used :
Eye Candy 4000 - Gradient Glow
Font Used :
Sloop
Elements Used :
Frame 1
Paper 6
Paper 12
Flag 2
Parakeet
Palm 1
LifeGuard 2
Waves 3
Boy 1
Boy 2
Glitter
Anchor
Leaves
Chest 1
Lets Begin :
Start by opening a new 800 X 650 white canvas. (Don't worry you can crop it later )
Open Frame 1 - Copy & paste it as a new layer onto your canvas - then re-size it to 50%. Then re-size it again to 65%.
(To re-size go to Image - click Re-size)
Click Ok
Now go to Image - click Free Rotate - set it to Right , 90 & click Ok.
Now use your Move Tool to position your Frame 1 element to the center of your canvas.
Activate your Magic Wand - now click inside each frame opening.
Go to Selections - click Modify - Expand
Set your number of pixels to 9 & click Ok.
Open Paper 6 - Copy & paste it as a new layer onto your canvas - then re-size it to 50% , do this size 3 times total.
Now go to Selections - click Invert -
Then on your keyboard press your delete key 1 time.
Go to Selections & click Select None.
In your Layers Pallet - move your Paper 6 layer down under your Frame 1 layer.
Go to Adjust - Sharpness - Sharpen
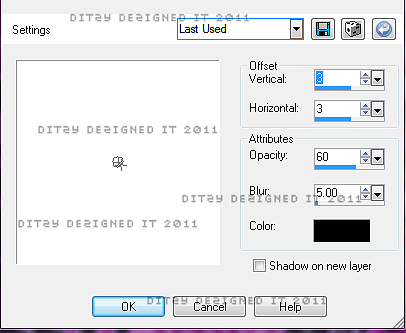
Then go to Effects - 3D Effects - Drop Shadow
Click Ok
Now click on your background layer in your layers pallet -
Open Glitter - Copy & paste it as a new layer onto your canvas - then re-size it to 20%.
Use your move tool & position it to the left side of your frame.
Go back to your layers pallet - right click on your Glitter layer - click Duplicate - then go to Image & click Mirror. Use your move tool to adjust the position of your duplicated Glitter element if needed.
Back to your layers pallet - right click on your duplicated Glitter layer - click Merge - Merge Down
Now go to Adjust - Sharpness - Sharpen
Now open Paper 12 - Copy & paste it as a new layer onto your canvas - then re-size it to 50%, three times.
Go to Layers - Load/Save Mask - Load Mask From Disk
, choose your mask of choice & click load.
Go to your layers pallet - right click on your Mask layer - click Merge Group.
Now right click on your Mask layer again & click Duplicate.
Right click on your duplicated layer & click Duplicate again.
Now use your move tool & position it to the center of your frame.
Duplicate your duplicated Mask layer again & use your move tool & position it to the right end of your frame.
Go to your layers pallet - right click on your top mask layer - click Merge - Merge Down.
Then right click again on your newly merged mask layer - click Merge - Merge Down.
Now all 3 mask layers should be 1 complete layer.
Go to Adjust - click Add/Remove Noise - then click Add Noise
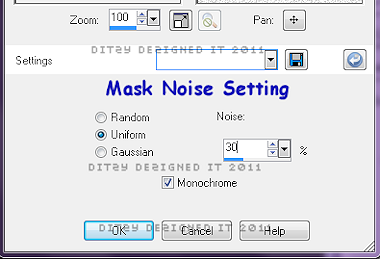
Click Ok.
Now in your layers pallet click on your Frame 1 layer -
Open your Flag 2 element - Copy & paste it as a new layer onto your canvas - then re-size it to 20%.
Position it to the upper left corner of your frame. (See my tag for example)
Then go to Adjust - Sharpness - Sharpen
Then Effects - 3D Effects - Drop Shadow
Click Ok
Click on your top layer in your Layers Pallet -
Open your Parakeet element - Copy & paste it as a new layer onto your canvas - then re-size it to 15%.
Use your move tool to position it to the top of your frame.
Adjust - Sharpness - Sharpen
Effects - 3D Effects - Drop Shadow (Same settings as before)
Open Palm 1 element - Copy & paste it as a new layer onto your canvas - then re-size it to 20%.
Use your move tool to position it to the right end of your frame.
Adjust - Sharpness - Sharpen
Effects - 3D Effects - Drop Shadow
Open LifeGuard 2 element - Copy & paste it as a new layer onto your canvas - then re-size it to 15%. Then re-size it again to 50%.
Use your move tool to position it center on your frame.
Adjust - Sharpness - Sharpen
Effects - 3D Effects - Drop Shadow
Click on Paper 11 layer in your layers pallet -
Open your Wave 3 element - Copy & paste it as a new layer onto your canvas - then re-size it to 20%, then re-size it again to 70%.
Use your move tool to position it in your frame.
Now use your Pick Tool to bring in each end of your Wave 3 element until the ends are hidden by the frame.
Go to Effects - 3D Effects - Drop Shadow (Same settings as before)
Now go to your layers pallet - right click on your Wave 3 layer - then click Duplicate. Now right click on your Duplicated layer & click Duplicate it again.
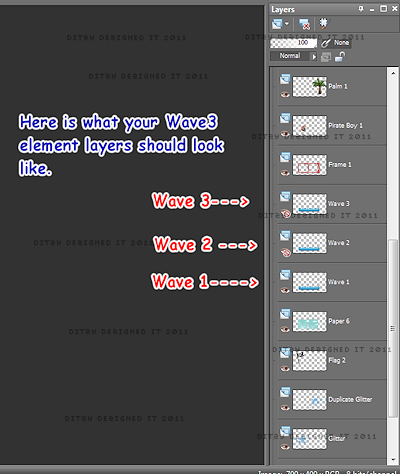
You should now have a total of 3 Wave layers. Now rename them, bottom to top - Wave 1 - Wave 2 - Wave 3
Close off the top two wave layers by clicking the eye next to each layer -
Click on Wave 1 layer - Go to Adjust - Add/Remove Noise - Add Noise
Click Ok -
Now open your Wave 2 layer -
Adjust - Add/Remove Noise - Add Noise -
Click Ok.
Now open your Wave 3 layer -
Adjust - Add/Remove Noise - Add Noise -
Click Ok.
Now back in your layers pallet - click the eye's (to close the layer) on your Wave 2 & Wave 3 layers. (This way when it comes time to animated your layers are ready.)
Click on your Paper 6 layer in your layers pallet -
Open your Boy 1 element - Copy & paste it as a new layer onto your canvas - then re-size it to 20%. Then re-size it again to 50%.
Go to Image - click Mirror.
Use your move tool to position it in the left frame.
Adjust - Sharpness - Sharpen
Effects - 3D Effects - Drop Shadow (Same settings as before)
Now click on your very top layer - in your layers pallet -
Open your Boy 2 element - Copy & paste it as a new layer onto your canvas - then re-size it to 20%. Position it using your move tool to the right end of your frame.
Adjust - Sharpness - Sharpen
Effects - 3D Effects - Drop Shadow (Same settings as previously used)
Open Anchor element - Copy & paste it as a new layer onto your canvas -then re-size it to 20%. Use your move tool to position it to the left end of your frame.
Adjust - Sharpness - Sharpen
Effects - 3D Effects - Drop Shadow (Same settings)
Open your Leaves 1 element - Copy & paste as a new layer onto your canvas - Re-size it to 20%. Use your move tool to position it beside your Anchor element.
Adjust - Sharpness - Sharpen
Effects - 3D Effects - Drop Shadow
Open your Chest 1 element - Copy & paste it as a new layer on your canvas - then re-size it to 20%. Then re-size it again to 50%. Use your move tool to position it on top of your Anchor & Leaves element .
Adjust - Sharpness - Sharpen
Effects - 3D Effects - Drop Shadow (same settings as before)
Open your Sun element - Copy & paste it as a new layer onto your canvas - then re-size it to 20%. Then re-size it again to 40%. Now use your move tool to position it in the right side of your frame.
Adjust -Sharpness - Sharpen
Effects - 3D Effects - Drop Shadow
Now add your credit information.
Now add your name -
I used :
Font : Sloop
Size : 100 Pixels (Depends on the length of your name)
Background Color : #1515b9
Foreground Color : set to nul
Position your name where you want it on your tag,
Then go to your layers pallet - right click on your name layer , then click Convert To Raster Layer
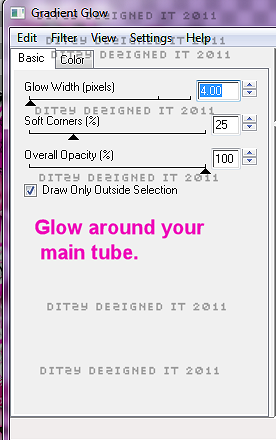
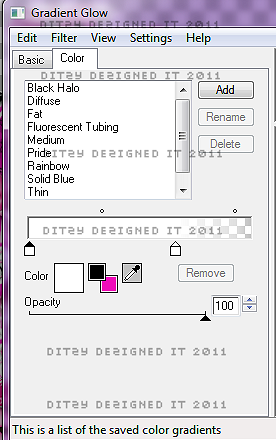
Then go to Effects - Plugins - Eye Candy 4000 - Gradient Glow
(You can use my settings or your own - make sure you click on your Color tab & change your color to white :-)
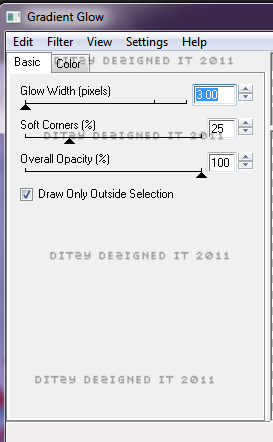
Click Ok.
Now go to Effects - 3D Effects - Drop Shadow
Activate your crop tool - crop off any access canvas that you did not use.
.
Then open your Animation Shop -
Go back to your psp -
Click on your Wave 1 layer - Copy Merged
Go to Animation Shop -
Right click on your grey work area - then click Paste As New Animation.
Go back to PSP -
Click on your Wave 2 layer & click the eye next to it to open the layer, then click the eye next to your Wave 1 layer to close it.
Copy Merged -
Animation Shop -
Right click in your 1st frame - then click Paste - After Current Frame
Go back to PSP -
Click on your Wave 3 layer & click the eye next to it to open the layer, then click the eye next to your Wave 2 layer to close it.
Go to Animation Shop -
Right click in your 2nd frame - click Paste - After Current Frame
Now view your animation to make sure it is how you want it.
Before you save it you might want to re-size it to fit where you will be using it. To re-size your tag in Animation Shop - on your keyboard - press your Shift & S key to open your re-size menu.
The size I used on my screen shot is the size I use for my personal blog - you may want yours bigger or smaller - so just adjust it accordingly.

Click Ok.
Now go to File - Save As - set it to GIF - name your tag & click Save to finish this tutorial!!♥
Sunday, August 21, 2011
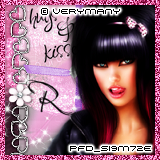
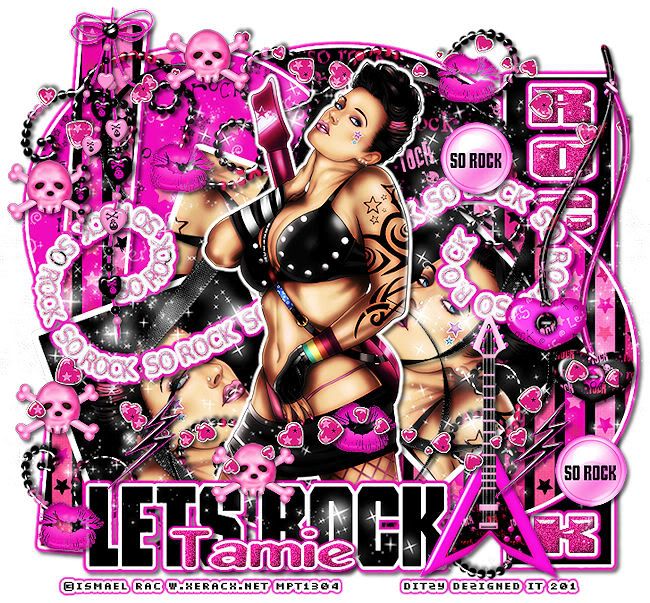
♥So Rock Pink (PTU)
**This tutorial was written & posted by DitzyDezigns on August 21st 2011**
***Any resemblance to any other tutorial is purely coincidental & completely unintentional!!!***
Here is what we will be making :
Supplies Needed :
Paint Shop Pro X2 (Any version should work)
Tube Of Choice - I used the awesome work of Ismael Rac . Which is available for purchase @ Ismael Rac
(My license # states MPT because that is where I purchased it from, but he has since moved to his own store :-)
Scrapkit - So Rock Pink By Tamie @ Addictive Pleasures
Template 104 also by Tamie @ Addictive Pleasures Template Blog
Plugins Used :
Eye Candy 5 Impact - Gradient Glow
Eye Candy 5 Impact - Glass
Eye Candy 4000 - Gradient Glow
Elements Used :
P9
P6
P3
Text
Beads3
Skull
Button2
Kiss
Beads2
Hearts2
Guitar2
SwirlRibbon
Scattered Hearts
Lightening
Sparkles
Lets Begin :
Open your Temp104 -
Go to Image - click Canvas Size - set your size to 800 X 700 (Don't worry you can crop it at the end of the tutorial - but this gives you more room to work with!)
Now go to your layers pallet - delete the credit & background layers.
Now in your layers pallet - click on Raster 9 layer - then go to Selections & click Select All - Float - Defloat -
Now open P3 - Copy & paste it as a new layer onto your canvas - then go to Selections - click Invert - then on your keyboard press your delete key 1 time.
Go back to Selections & click Select None.
Now go to Effects - click Plugins - Eye Candy 5 Impact - Gradient Glow -
You can either use my settings below or your own .
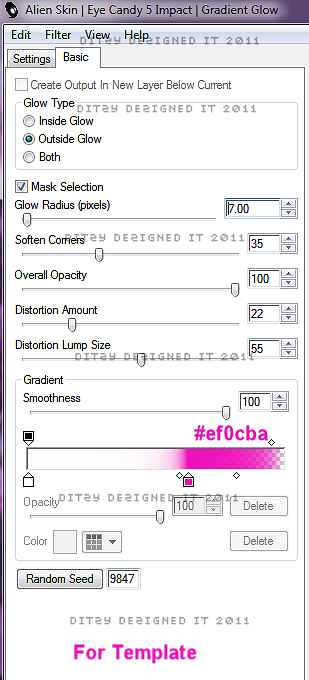
Click Ok.
Now go to Effects - click 3D Effects - then click Drop Shadow
Again you can use my settings below or your own -
Click Ok.
Now go to your layers pallet & delete your original Raster 9 layer.
Now click on your Raster 4 layer - follow the exact same steps you followed above for this layer as well, only this time use P6 .
Also remember to apply your Gradient Glow & Drop Shadow.
Continue to follow those steps for the following layers :
Raster 5 (Use P9)
Raster 14 (Use P9)
Now in your layers pallet - click on your Raster 1 layer -
Go to Selections - click Select All - Float - Defloat
Now open your tube of choice - Copy & paste the close up tube as a new layer onto your canvas. Position it to your liking.
Then go to Selections & click Invert . Then on your keyboard press your delete key 1 time. Now go to Selections & click Select None.
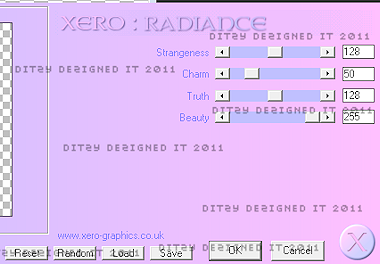
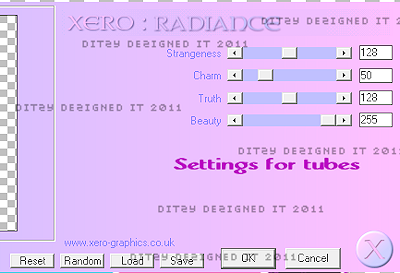
Go to Effects - click Plugins - then click Xero - Radiance
You can use my settings below or your own
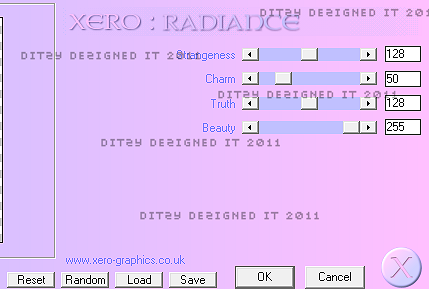
Click Ok.
Now click on Raster 2 layer - go to Selections - click Select All - Float - Defloat
Make a new raster layer -
Set your Foreground color to #000000 (Black)
Now using your flood fill tool - flood fill your area between your marching ants.
Keeping your raster selected - Copy & paste your close up tube again, this time position it so that a different area is visible.
Go to Selections - click Invert then on your keyboard press your delete key 1 time.
Now go to Selections & click Select None.
Go to Effects - click Plugins - Xero - Radiance
Same settings you used earlier
Click Ok.
Now follow the same steps for your Raster 3 layer.
Now copy & paste your full length tube onto your canvas - then position it center on your template.
Go to your layers pallet - move your full tube layer down so it is below your Raster 11 layer.
Go to Effects - Plugins - Xero - Radiance
Use the same settings you used earlier.
Then go to Effects - click Plugins - Eye Candy 4000 - Gradient Glow
Click Ok & apply a drop shadow.
Now in your layers pallet - Delete your Raster 12 layer.
Then click on your Raster 11 layer - then go to Effects - click Plugins - Eye Candy 5 Impact - Gradient Glow
(Same settings you used earlier)
Now click on Raster 10 - Apply Eye Candy 5 Impact - Gradient Glow.
Now on Raster 13 - Activate your Magic Wand tool - click inside each visible letter R-O-C-K
Then once selected make a new raster layer -
Now flood fill your letters with #dd208b
Then go to Selections & click Select None.
Now go to Effects - click Plugins - Eye Candy 5 Impact - Gradient Glow
Use the same settings as before.
Then Effects - 3D Effects - Drop Shadow
Also same settings as before.
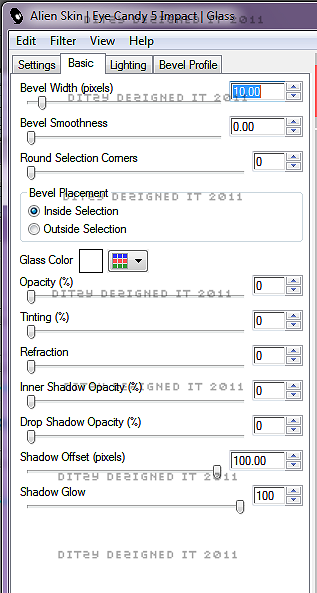
Now use your magic wand again & click inside each letter again - then go to Effects - Plugins - Eye Candy 5 Impact - Glass
You can use my settings below or your own -
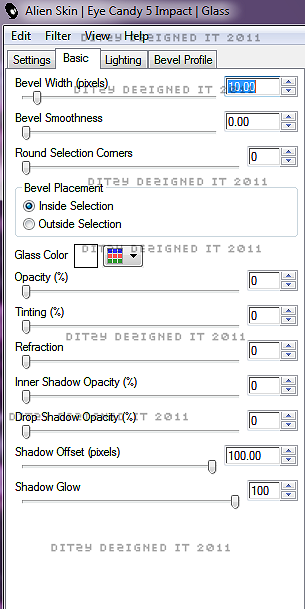
Click Ok.
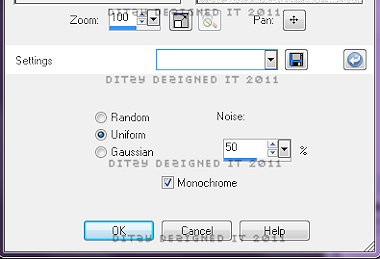
Keeping your letters selected go to Adjust - click Add/Remove Noise - then click Add Noise
Set to Uniform 40 & make sure your Monochrome box IS checked, then click Ok.
Now go to Selections & click Select None.
Open your Text element - Copy & paste it as a new layer onto your canvas. Then re-size it to 80%. Now position it to your liking.
Go to Effects - Plugins - Eye Candy 5 Impact - Gradient Glow
Same settings as before.
Then apply a drop shadow.
In your layers pallet - move your Text element layer down below your full tube layer.
Open your Beads 3 element - Copy & paste them as a new layer onto your canvas . Then position them to your liking.
Go to your layers pallet & move your Beads3 layer down below your full tube & text layers.
Go to Adjust - click Sharpness - Sharpen
Apply a drop shadow.
Open your Skull element - Copy & paste it as a new layer onto your canvas - then re-size it to 40%. Now position it to your liking.
Go to Adjust - Sharpness - Sharpen
Then apply a drop shadow.
Go to your layers pallet - right click on your Skull layer - then click Duplicate. Position to your liking.
Open your Button2 element - Copy & paste it as a new layer onto your canvas - then re-size it to 30%. Position to your liking.
Adjust - Sharpness - Sharpen
Apply a drop shadow.
Go to your layers pallet & duplicate your Button 2 layer - use move tool to position to your liking.
Open your Kiss element - Copy & paste it as a new layer onto your canvas - then re-size it to 30%. Position it to your liking.
Sharpen & apply a drop shadow.
Go to your layers pallet - duplicate your Kiss layer a couple of times - position each one to your liking.
Open your Beads 2 element - Copy & paste it as a new layer onto your canvas - then re-size it to 65%. Position it on the upper left corner of your template.
Sharpen & apply a drop shadow.
Open your Hearts 2 element - Copy & paste it as a new layer onto your canvas - then re-size it to 65%. Position it to the upper right corner of your template.
Sharpen & apply a drop shadow.
Open your Guitar element - Copy & paste it as a new layer onto your canvas - then re-size it to 50%. Position it to the right of your full tube.
Sharpen & apply a drop shadow.
Open your Swirl Ribbon element - Copy & paste it as a new layer.
Go to your layers pallet - move your Swirl Ribbon layer down below your text layer.
Sharpen & apply a drop shadow.
Open your Scattered Hearts element - Copy & paste it as a new layer onto your canvas - then re-size it to 75%. Position it to the lower part of your template.
Sharpen & apply a drop shadow.
Go to your layers pallet - duplicate your Scattered hearts layer - go to Image & click Flip.
Now move your top ScatteredHearts layer down below your full tube layer.
Open your Lightening element - Copy & paste it as a new layer onto your canvas - Then re-size it to 30%. Position to your liking.
Sharpen & apply a drop shadow.
Open your Sparkles element - Copy & paste as a new layer onto your canvas - then move it to the left of your template.
Go to your layers pallet - duplicate your sparkles layer - then go to Image & click Mirror.
Then in your layers pallet - right click on your duplicated Sparkles layer - click Merge - Merge Down.
Now move your merged layer below your full tube layer.
Now copy & paste your Sparkles element again - use your move tool & position it down towards the bottom of your template.
In your layers pallet - move your new Sparkles layer above your Raster 11 layer.
Add your name & copyright information
I used the following for the name on my tag :
Font : Abbey Medium Extended
Size : 65 Pixels
Color : #dd208b
Once you have your name positioned - go to your layers pallet - right click on your name layer - click Convert to Raster Layer.
Go to Effects - Plugins - Eye Candy 5 Impact - Gradient Glow
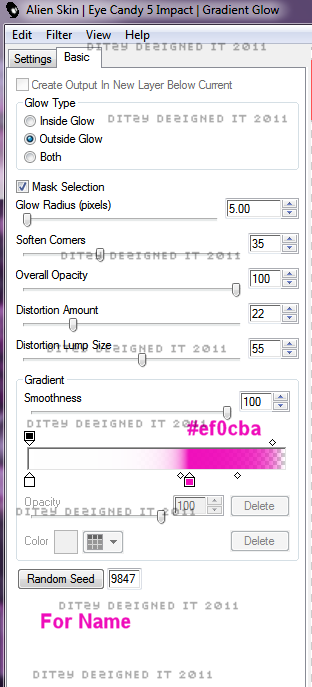
Click Ok.
Now apply a drop shadow.
Use your magic wand & click inside each letter of your name - then go to Effects - click 3D Effects - Inner Bevel

Click Ok
Now go to Adjust - click Add/Remove Noise - Add Noise - set to Uniform 40 & make sure your Monochrome box IS checked.
Click Ok.
Selections & click Select None.
Now go to your layers pallet - right click on any layer & click Merge - Merge Visible.
Then activate your crop tool - crop off any access canvas you did not use.
Re-size & sharpen
Save as PNG & you have compeleted this tutorial!♥
♥Coming Up Daisies♥ Intermediate (Animated)
**This tutorial was written & posted by DitzyDezigns on August 21st 2011**
***Any resemblance to any other tutorial is purely coincidental & completely unintentional!***

Supplies Needed :
Plugins Used :
Font Used :
Impact
Elements Used :
Lets Begin :


Here is what we will be making :
Supplies Needed :
Paint Shop Pro X2 (Any version should work)
Animation Shop
Tube Of Choice - I used PinUp Toons now available at CDO
Scrapkit : CDS August Challenge @ Cool Scraps Digital Store Or CDO Forum
Plugins Used :
Eye Candy 4000 - Gradient Glow (Optional)
Eye Candy 5 Impact - Glass (Optional)
Xero - Radiance (Optional) Font Used :
Impact
Elements Used :
Element02
Element04
Element 01
Element03
Element05
Element06
Papers 01 & 02
Lets Begin :
Start by making a new 800 X 650 transparent canvas. (Don't worry we will crop it a bit at the end of the tutorial!)
To open a new canvas go to File - click New
Click Ok
Now Open Element02 from your kit - Copy & paste it as a new layer onto your canvas - then re-size it to 65%. Now use your move tool & position your Element02 (frame) to the center of your canvas.
Now click on your Magic Wand tool to activate it. Then click inside your Element02 (Frame)
Go to Selections - click Select All - Selections again & click Modify - then click Contract - set your Number Of Pixels to 5 & click Ok.
Now Open Paper01 - Copy & paste it INTO SELECTION.
Go back to Selections - click Select None.
Go to your Layers Pallet - Move your Paper01 layer down so that it is directly below your Element02 layer.
Now open your Tube of choice - Copy & paste it as a new layer onto your canvas - then position it center of your frame. Now go to your layers pallet - right click on your tube layer - then click Duplicate. Now move your duplicated tube layer up above your frame (Element02) layer.
(You should have one tube layer below your frame (Element02) layer & your duplicated Tube layer should be above your Element02 layer.)
Now on your top tube layer - activate your Eraser Tool - & erase the legs off of your tube. (If you are using a different tube erase the parts that you don't want visible.)
Once you have the part erased from the top tube layer - go to your layers pallet & click on your bottom tube layer & erase the exact same parts.
Click back up on your Top Tube layer - go to Effects - click Plugins - then click Xero - then Radiance.
(You can use my settings below or your own)
Click Ok.
Now in your layers pallet - click on your bottom tube layer - then go to Effects -click 3D Effects - then click Drop Shadow. (Again you can use my settings below or your own)
Click ok.
Now click on the very top layer in your layers pallet -
Open your Element04 - Copy & paste it as a new layer onto your canvas - then re-size it to 75%. Using your move tool , position it at the top of your frame.
Now go to your layers pallet - move your Element04 layer down below your Paper01 layer.
Go to Adjust - click Sharpness - then click Sharpen.
Now in your layers pallet - right click on your Elelemt04 layer - then click Duplicate. Using your Move Tool position your duplicated Element04 down so it is directly below your first one.
Now duplicate it 2 more times & move each one down so that it makes a square around your frame.
Open Element01 - Copy & paste it as a new layer onto your canvas - then re-size it to 35%. Position it to the bottom left corner of your frame.
Adjust - Sharpness - Sharpen
Effects - 3D Effects - Drop Shadow (Same settings as before)
Open Element05 - Copy & paste it as a new layer onto your canvas - then re-size it to 30%. Position it to the bottom left corner on your frame.
Adjust - Sharpness - Sharpen
Effects - 3D Effects - Drop Shadow (Same settings)
Go to your layers pallet - Right click on your Element05 layer - then click Merge - then click Merge Down.
Now your Element 01 & Element 05 layers should be in one layer.
Now right click on your merge layer - then click Duplicate - Go to Image & click Mirror.
Use your move tool to adjust the position of your duplicated layer if needed.
Open Element06 - Copy & paste it as a new layer onto your canvas - then re-size it to 50% , Position it to the lower left of your frame.
Adjust - Sharpness - Sharpen
Effects - 3D Effects - Drop Shadow (Same settings)
Move this layer down in your layers pallet so it is under your top tube layer.
Go to your layers pallet - Right click on your Element06 layer - then click Duplicate. Go to Image & click Mirror.
Open Element 03 - Copy & paste it as a new layer onto your canvas - then re-size it to 50%. Use your move tool to position it to the upper left corner of your frame.
Go to Image - click Free Rotate - set it to Right 90.00 & click Ok.
Adjust - Sharpness - Sharpen
Effects - 3D Effects - Drop Shadow (Same Settings)
Go to your layers pallet - right click on your Element 03 layer & click Duplicate. Go to Image & click Mirror.
Click on the last layer in your layers pallet -
Open Paper02 - Copy & paste it as a new layer onto your canvas.
Now activate your crop tool - crop off a bit of your canvas. (See my tag for example)
Now we are going to add a couple of borders -
Click on your last layer in your layers pallet again - Go to Selections - click Select All - Selections again & click Modify - then click Contract. Set your number of pixels to 8 & click Ok.
Go back to Selections & click Invert.
Now activate your Flood Fill tool - set your foreground color to #000000 (Black).
Make a new raster layer - then flood fill between your two marching ants lines.
Now go to Selections & click Select None.
In your layers pallet - move your Border 1 layer to the very top of your layers pallet.
Now for border 2-
Click on your last layer in your layers pallet again - go to Selections - click Select All - Selections again & click Modify - then click Contract - this time set your number of pixels to 3 & click Ok.
Go to Selections again & click Invert -
Now set your background color to #83959f , then make a new raster layer - now flood fill between the 2 marching ants again.
Go to Selections & click Select None.
Now in your layers pallet - move your 2nd border layer up above your 1st border layer.
Activate your text tool - set your font, size & color
I used :
Font : Impact
Size : 100 Pixels
Background Color : #83959f
Foreground Color : Set to nul
Click on your canvas to open your text box - type out the name you want on your tag. Then click Apply.
Now position your name where you would like it on your tag.
Once happy go to your layers pallet - right click on your name layer - then click Convert To Raster Layer.
Go to Effects - click Plugins - then click Eye Candy 4000 - Gradient Glow
(You can use my settings or your own)
Now go to Effects - click 3D Effects - then click Drop Shadow. (Use the same settings as before)
Now add any copyright & credit information.
Go to your layers pallet - click on your Name layer - now activate your magic wand tool - then click inside each letter in your name.
Now once they are all activated go to Effects - click Plugins - then click Eye Candy 5 Impact - then click Glass.
You can use my settings or your own -
Click Ok.
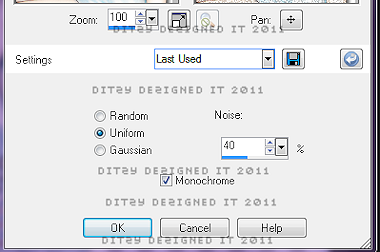
Now go to Adjust - click Add/Remove Noise - then click Add Noise -
Now set your settings -
Click Ok.
Selections & click Select None.
Now click on your top border layer - add the same noise settings to that layer.
Go to Edit - click Copy Special - then click Copy Merged -
Open your Animation Shop
Right click in your Animation Shop & click Paste As New Animation -
Go back to your PSP -
Click your undo button 4 times -
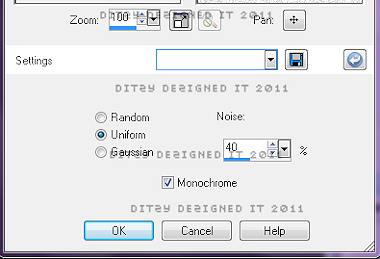
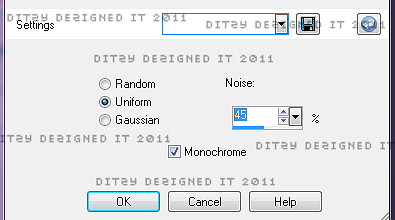
Go to Adjust - Add/Remove Noise - Add Noise & change your setting to 45
Click Ok
Now Select None.
Go to your top border layer & add the same noise setting
Go to Edit - click Copy Special - then click Copy Merged
Go to Animation Shop - right click inside frame 1 & click Paste - then click After Current Frame
Go back to your PSP -
Click your undo button 4 times -
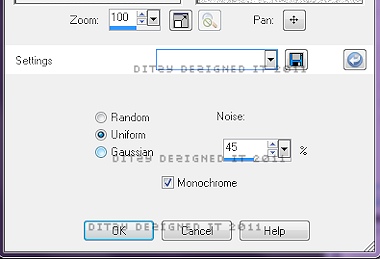
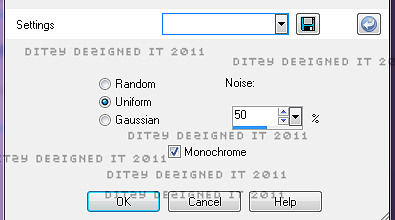
Adjust - Add/Remove Nosie - Add Noise
Click Ok
Now go to Selections & click Select None.
Click on your top border layer & apply the same Noise settings.
Edit - Copy Special - then click Copy Merged
Go to Animation Shop - right click in frame 2 & click Paste - then click After Current Frame.
Now you will want to view your animation to make sure you are happy.
Then all that is left is to save it as a GIF file & you have completed this tutorial!!♥
Saturday, August 20, 2011
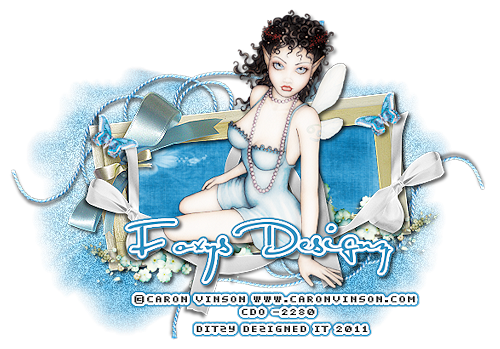
♥Summer Breeze PTU♥ Intermediate
**This tutorial was written & posted by DitzyDezigns on August 20th 2011**
***Any resemblance to any other tutorial is purely coincidental & completely unintentional!!***
Here is what we will be making :
Supplies Needed :
Paint Shop Pro X2 (Any version should work)
Tube Of Choice - I used Caron Vinson which you can purchase at CDO
Scrapkit - Summer Breeze By Foxys Designz @ Cool Scraps Digital
Mask Of Choice
Font Used :
Al Sandra
Elements Used :
Element18
Element 3
Element 35
Element 8
Element 17
Papers 1 & 4
Lets Begin :
Start by making a new 800 X 650 transparent canvas. Go to File - click New -
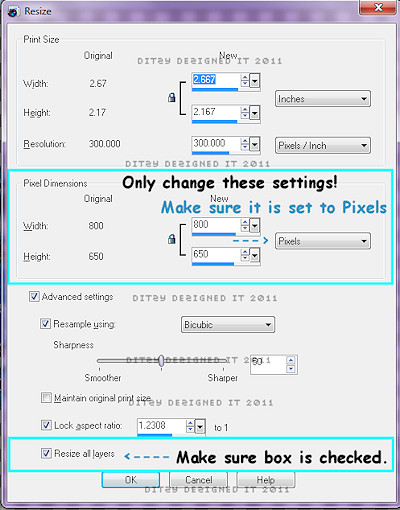
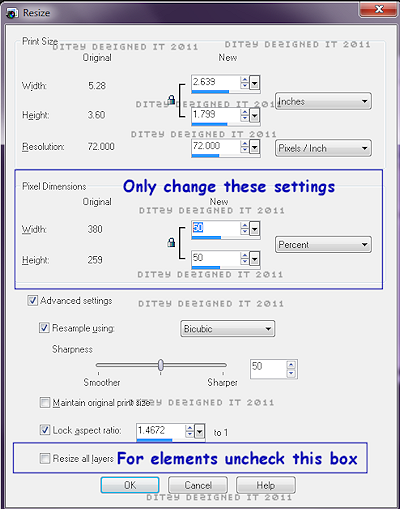
Open Element 18 from your kit - Copy & paste it as a new layer onto your canvas. Now re-size it to 50%.
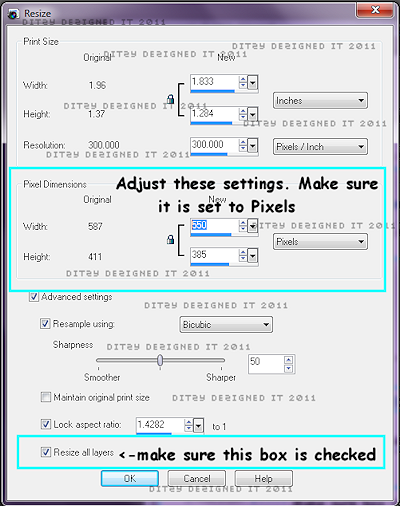
To re-size - go to Image - click Re-size . Then this menu will open -

Click Ok. Now use your move tool to position your Element 18 on your canvas , position it in the center of your canvas.
Now click on your Magic Wand tool to activate it. Now go to your canvas & click inside your Frame (Element 18).
Go to Selections - click Modify - then click Expand from the pop out menu.
Now on the menu that opens set your Number Of Pixels to 10 & click Ok.
Make a new Raster Layer.
Now Open Paper 4 from your kit - Copy & paste your paper INTO SELECTION.
Now go to your layers pallet - move your Paper 4 layer down so that it is under your Frame (Element 18) layer.
Go to Selections & click Select None.
Now in your layers pallet - click on your Raster 18 layer, go to Adjust - click Sharpness - then click Sharpen.
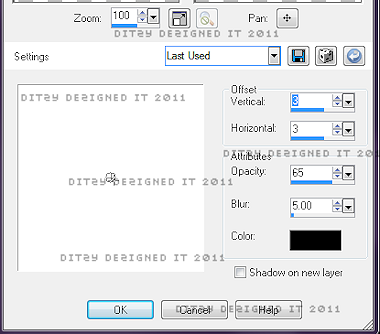
Now go to Effects click 3D Effects - then click Drop Shadow.
You can use my settings below - or your own, the choice is always yours :-)
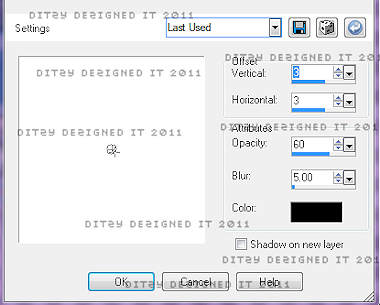
Click Ok.
Now open your Tube of choice - Copy & paste it as a new layer onto your canvas - then re-size it to 65%. (This size will depend on the tube you are actually using. If it is the same as mine, the 65% works best. If you are using a different tube, then just play with the size until you are happy with it.)
Now use your move tool & position your tube so that it looks like she is sitting on the bottom edge of your Frame (Element 18).
Go to Effects - click Plugins - then click Xero - then click Radiance.
Again you can use my settings or your own-

Now click Ok.
Go to Effects - click 3D Effects - then click Drop Shadow.
Use the same settings that you used for your frame (Element 18) & click Ok.
Now open Element 17 - Copy & paste it as a new layer onto your canvas. Then re-size it to 50%.
Now go to Image - click Mirror.
Now use your move tool to position your Element 17 to the left side of your tube. Now go to your layers pallet - Right click on your Element 17 layer. Then click Duplicate. Now go to Image & click Mirror.
Use your move tool again to adjust the position of your duplicated Element 17 if you need to.
Open Element 8 - Copy & paste it as a new layer onto your canvas. Now re-size it to 30%. Use your move tool to position your Element 8 to the upper right corner of your frame. (Element 18)
Go to Adjust - click Sharpness - then click Sharpen.
Then go to Effects - click 3D Effects - then click Drop Shadow. (Use the same settings for your Drop Shadow that you used on previous elements.)
Now go to Image - click Free Rotate , then the following menu will open -
Set your settings as follows -

Click Ok.
Now go to your layers pallet - right click on your Element 8 layer - then go to Image & click Mirror.
Use your move tool to adjust the position of your duplicated Element if needed.
Open Element 35 - Copy & paste it as a new layer onto your canvas - then re-size it to 40%. Use your move tool & position it to the upper left corner of your Frame (Element 18)
Now go to Image & click Free Rotate - set the settings as follows -
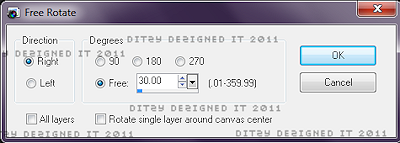
Click Ok.
Now go to your layers pallet & move your Element 35 layer down below your Paper 4 layer.
Go to Adjust - click Sharpness - then click Sharpen.
Go to Effects - click 3D Effects - Drop Shadow.
Use the same settings you have been using.
Now go to your layers pallet - right click on your Element 35 layer - then click Duplicate. Then go to Image & click Flip.
Now in your layers pallet - click on the very last layer in your pallet -
Open Paper 1 - Copy & Paste it as a new layer onto your canvas - then re-size your Paper 1 to 80%.
Go to Layers - click Load/Save Mask - then click Load Mask From Disk - now the following menu will open. You can use the settings I have or your own, which ever works best for you. (I do not remember where I got my mask from, other wise I would of provided a download link for you, but being I can't give credit where credit is due, I can not give you the mask. But any mask you think looks good will work just as well :-)

Click Ok.
Now go to your layers pallet - right click on your Mask layer - then click Merge - then from the slide out menu click Merge Group.
Now go to Image & click Re-size. Now re-size your Mask to 50%, Then use your move tool to position your Mask to the left side of your frame. (element 18).
Go back to your layers pallet - right click on your Mask layer & click Duplicate. Now right click on your Duplicated Mask layer & click Merge - then from the slide out menu click Merge Down.
Now right click on your new merged Mask layer & click Duplicate. Now go to Image & click Mirror. Use your move tool to adjust your new duplicated Mask if needed.
Now go back to your layers pallet - right click on your duplicated Mask layer - then click Merge - then click Merge Down.
(Now your 2 mask layers should become 1)
On your merged Mask layer - go to Adjust - click Add/Remove Noise - then click Add Noise.
The following menu will open - set your settings as desired or you can use mine below.

Click Ok.
Now in your layers pallet click on your top layer in the pallet.
Now open Element 3 - Copy & paste it as a new layer onto your canvas - then re-size it to 50%. Using your move tool - position your element 3 to the lower right corner of your frame.
Now go to Adjust - click Sharpness - then click Sharpen.
Go to Effects - click 3D Effects - then click Drop Shadow. (Use the same settings as before)
Now go to your layers pallet - move your Element 3 layer down so that it is directly below your tube layer.
Then right click on your Element 3 layer & click Duplicate.
Now go to Image & click Mirror.
Use your move tool to adjust the position of your duplicated element 3 if needed.
Now click on your text tool to activate it. Set your font, size & color. I used :
Font : Al Sandra
Size : 40 Pixels
Background Color : #3291c1
Foreground Color : Set to nul
Now click any where on your canvas - then your text box will open. Now type out the name you want on your tag. Then click Apply. Now position your name to your liking.
(If you intend on making this tag in the future for other people, you will want to save it now as a PSP File, then continue with the tutorial :-)
Now go to your layers pallet - right click on your name layer - then click Convert To Raster Layer.
Then go to Effects - click Plugins - then click Eye Candy 5 Impact - then click Gradient Glow from the slide out menu.
(Again you can use my settings or your own)
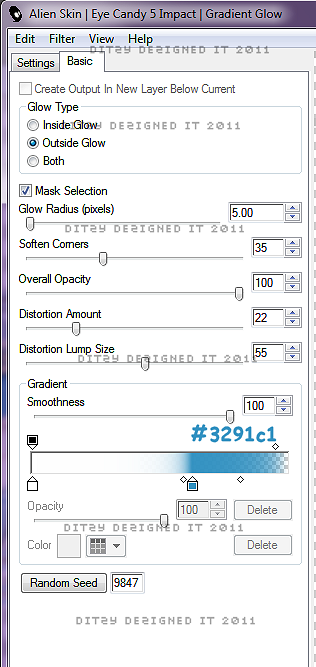
Click Ok.
Go to Effects - click 3D Effects - then click Drop Shadow. (Use the same settings you have been using.)
Now you will need to apply your copyright, license & credit information. (Very important not to forget this step)
Once you are happy with your tag, go to your layers pallet - right click on any layer - then click Merge - then from the slide out menu click Merge Visible.
Now activate your Crop Tool - crop off any access canvas that you did not use.
Then you will need to re-size your tag - this size depends one where you will be using your tag & what their size limits are.
To re-size go to Image - click Re-size -
Click Ok.
Now go to Adjust - click Sharpness - then click Sharpen.
All that is left is to save your tag as a PNG file & you have completed this tutorial!♥
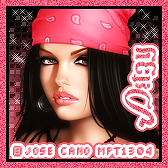
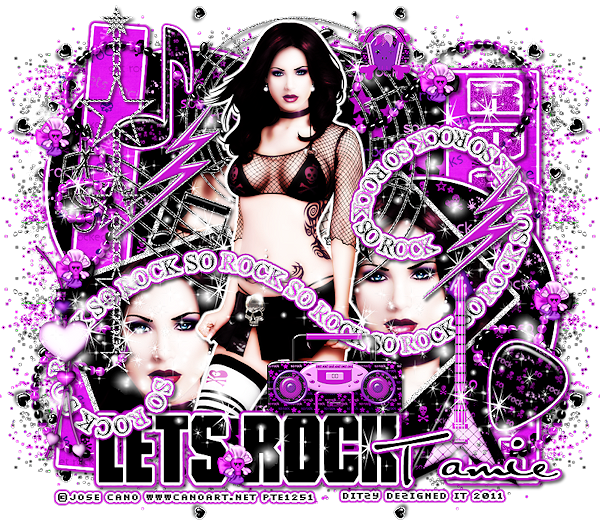
♥So Rock (Violet) PTU♥
**This tutorial was written & posted by DitzyDezigns on August 20th 2011**
***Any resemblance to any other tutorial is purely coincidental & completely unintentional!!!***
Here is what we will be making :
Supplies Needed :
Paint Shop Pro X2 (Any version should work)
Tube Of Choice - I used the amazing work of Jose Cano @ PTE
(Purchase & License Required To Use)
Scrapkit - So Rock Violet By Tamie @ Addictive Pleasures
Template 104 By Tamie @ Addictive Pleasures
Plugins Used :
Xero - Radiance (Optional)
Eye Candy 5 Impact - Glass
Eye Candy 5 Impact - Gradient Glow
Eye Candy 4000 - Gradient Glow
Fonts Used :
Al Sandra
Elements Used :
Papers 3,7 & 9
Text2
MusicNotes
Music Note
Guitar
Chain
Boombox
Beads
Bow2
Hearts
Glitter
Beads3
Guitar Pick
Lightening
SkullWithHeadPhones
Sparkles
Lets Begin :
Start by opening your template 104.
Once your template is open, go to Image - click Canvas Size
change your setting to 800 X 700 (Don't worry you can crop it later)
Now go to your layers pallet - delete the Credit & Background layers.
Still in your layers pallet -
Click on your Raster 9 layer - go to Selections - click Select All - Selections again & click Float - Selections again & click Defloat -
Now open Paper 3 from the kit - Copy & paste it as a new layer onto your canvas - then go to Selections & click Invert - now on your keyboard press your Delete key 1 time.
Go back to Selections & click Select None.
Go back to your layers pallet & delete your original Raster 9 layer.
Now click on your new Raster 9 layer - go to Effects - click Plugins - then go to Eye Candy 5 Impact - Gradient Glow - You can use my settings below or your own -
Click Ok.
Now go to Effects - click 3D Effects - then click Drop Shadow.
Again you can use my settings below or your own -
Click Ok.
Now you will follow those exact same steps for the following layers, only thing you will change is the Paper you use :-) -
Raster 10 - Use paper 7
Raster 4 - Use paper 9
Raster 14 - Use paper 7
Raster 5 - Use Paper 9
Now click on Raster 1 - go to Selections - click Select All - Selections again click Float - Selections again & click Defloat -
Now open your tube of choice -
Copy & paste your close up as a new layer onto your template - then position to your liking, then go to Selections & click Invert - then on your keyboard press your Delete key 1 time.
Go back to Selections & click Select None.
Now on your tube layer - go to Effects - click Plugins - then find your Xero plugin - then click Radiance -
Again you can use my settings or your own -
Then click Ok.
Now click on Raster 2 - Go to Selections - click Select All - Selections again then click Float - Selections again then click Defloat -
Now make a new Raster Layer - set your Foreground Color to black (#000000) then activate your Flood Fill Tool -
On your new raster layer flood fill your Raster 2 (Square) with your color.
Keeping your Raster 2 Selected, Copy & paste your close up tube again, now position it so that a different portion of the tube is showing, once happy with position go to Selections & click Invert . Then on your keyboard press your Delete key 1 time.
Go back to Selections & click Select None.
Now go to Effects - click Plugins - Xero - Radiance.
Use the exact same settings you used on your previous close up tube.
Click Ok.
Now you will want to repeat the steps above for the following layer -
Raster3
Now for Raster Layers 6,7,& 8 - Go to Adjust - click Add/Remove Noise - then click Add Noise - set to Uniform , 100 & make sure your Monochrome box IS checked , then click Ok.
Then go to Effects - click 3D Effects - then click Drop Shadow.
Apply your drop shadow to each frame that you added the noise too.
Click on Raster 13 - Activate your Magic Wand tool - click inside each letter that is showing - R-O-C-K.
Now make a new Raster Layer - activate your Flood Fill tool - set your Background Color to #ba0dc3
Now flood fill each letter .
Go to Selections - click Select None.
Now go to Effects - click Plugins - click Eye Candy 5 Impact - Gradient Glow - use the same settings you used previously.
Apply a drop shadow. (Using the exact same settings you have been using.)
Now activate your Magic Wand tool again - click inside each of the showing letters again R-O-C-K. Now go to Effects - click Plugins - then click Eye Candy 5 Impact - Glass -
You can use my settings or your own -

Click Ok.
Now keeping your letters selected go to Adjust - click Add/Remove Noise - set to , Uniform , 40 & make sure your Monochrome box is checked &click Ok.
Go to Selections & click Select None.
Back to your Layers Pallet - click on Raster 12 layer & delete it.
Now click on your Raster 11 layer & apply the Eye Candy 5 Gradient Glow , same settings as before.
Now apply a drop shadow.
Now copy & paste your full length tube - position it center on your template.
Then in your layers pallet - move your Tube layer down below your Raster 12 layer.
Now go to Effects - click Plugins - Xero - Radiance
Use same settings you used on your close up tubes.
Back to Effects - click Plugins - Eye Candy 4000 - Gradient Glow.
You can use my settings below or your own -


Click Ok.
Now apply a drop shadow to your main tube.
(Use the same settings you have been using)
Now lets add some elements to your template -
Open your Text2 element - Copy & paste it as a new layer onto your canvas - then use your move tool to position it to your liking.
Once happy with placement go to Effects - click Plugins - then click Eye Candy 5 Impact - Gradient Glow
(You can use my settings or your own)
Click Ok.
Apply a drop shadow.
Open your Music Notes element - Copy & paste it as a new layer - then re-size it to 70%. Now position it to your liking.
Go to your layers pallet - move your Music Notes layer down so it is directly under your Full Tube layer.
Go to Adjust - click Sharpness - then click Sharpen
Now apply a drop shadow to your element.
Open your Music Note Element - (This element is different from the last) - Copy & paste it as a new layer onto your canvas - then re-size it to 30%. Now position it to your liking.
Go to Adjust - Sharpness - Sharpen.
Apply a drop shadow.
Open your Guitar element - Copy & paste it as a new layer onto your canvas - then re-size it to 50%. Now position it to the right of your full tube.
Now go to Effects - click Plugins - Xero - Radiance.
Same settings as you used on your tubes.
Now apply a drop shadow to your Guitar element.
Open your Chain element - Copy & paste it as a new layer onto your canvas - then re-size it to 80%. Now position it to your liking.
Sharpen your element 2x's.
Apply a drop shadow.
Open your BoomBox element - Copy & paste it as a new layer onto your canvas - then re-size it to 40%. Position it to your liking.
Sharpen & apply a drop shadow.
Open your Beads element - Copy & paste it as a new layer onto your canvas - then re-size it to 70%. Position it to your liking.
Sharpen & apply a drop shadow.
Open your Bow2 element - Copy & paste it as a new layer onto your canvas - then re-size it to 25%. Now position it to your liking.
Sharpen & apply a drop shadow.
Go to your layers pallet - right click on your Bow2 layer - click Duplicate. Now use your move tool to position your duplicated element to your liking.
Open your Hearts element - Copy & paste it as a new layer onto your canvas - then re-size it to 65%. Position it to your liking.
Go to your layers pallet - move your Hearts layer down so that it is the last layer in the layers pallet.
Now right click on your Hearts layer - click Duplicate - go to Image & click Mirror.
Now right click on your duplicated Hearts layer , then click Duplicate - now go back to Image & click Flip.
Now duplicate again & go to Image & click Mirror.
Open your Beads3 element - Copy & paste it as a new layer onto you canvas - then position it to the left side of your template.
In your layers pallet - move your Beads3 layer down below your Full Tube layer.
Now right click on your Beads 3 layer & click Duplicate.
Then go to Image & click Mirror.
Use your move tool to adjust the position of your duplicated Beads3 layer if needed.
Open your Guitar Pick element - Copy & paste it as a new layer onto your canvas - then re-size it to 50%. Position it to the right of your Guitar element .
Go to Effects - click Pluguins - then click Eye Candy 5 Impact - Gradient Glow. Use the same settings as before.
Now apply a drop shadow.
Open your Lightening element - Copy & paste it as a new layer onto your canvas - then re-size it to 50%. Position it to the left of your Full Tube.
Sharpen & apply a drop shadow.
Go to your layers pallet - right click on your Lightening layer - click Duplicate. Now use your Move Tool to position it to the right side of your Full Tube.
Open your SkullWithHeadPhones element - Copy & paste it as a new layer onto your canvas - then re-size it to 30%. Now position it to your liking.
Sharpen & apply a drop shadow.
Now open your Sparkles element - Copy & paste it as a new layer onto your canvas - then position it towards the bottom of your template.
Go to your layers pallet - right click on your Sparkles layer & click Duplicate. Now go to Image & click Flip.
In your layers pallet - move your duplicated Sparkles layer down below your Full Tube layer.
Now duplicate your Sparkles layer again & use your move tool to position it in the middle of your template.
(If you wish to make this tag for several people you may want to save it now as a PSP File, that way you can re-open it at a later time & you will have all your layers & add your names. :-)
Now activate your Text Tool - Set your font, size & color.
I used :
Font : Al Sandra
Size : 70 Pixels
Background Color : #000000 (Black)
Foreground Color : Set to nul
Now click on your canvas to open your text box, type out the name you want on your tag. Then click Apply.
Now position your name where you would like it.
Go to your layers pallet - right click on your Name layer - click Convert To Raster Layer.
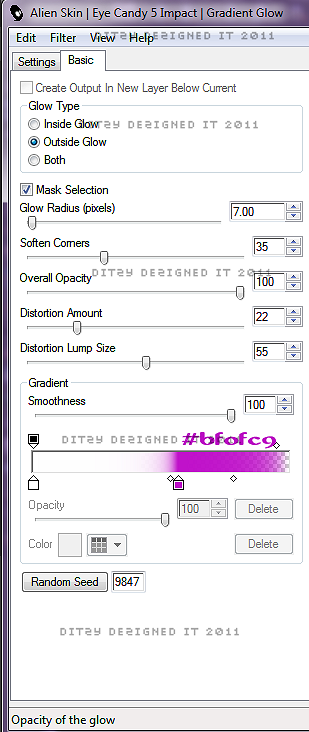
Now go to Effects - click Plugins - Eye Candy 5 Impact - Gradient Glow
Set your second color to #bf0fc9
Click Ok.
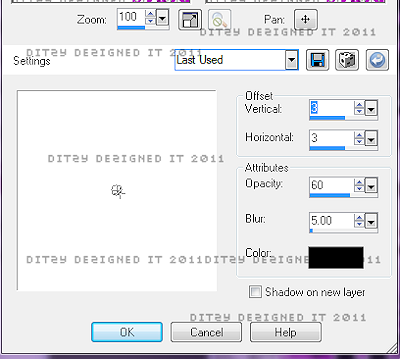
Now go to Effects click 3D Effects - Drop Shadow.
Use same settings you have used through out the tutorial.
Now add your copyright & credit information. (Do not skip this step! Very Important!!)
Now once you are happy with every thing on your tag - go to your layers pallet - right click on any layer - then click Merge - then click Merge Visible.
Now if needed activate your Crop Tool & crop off any access canvas that you did not use.
Once cropped you may want to re-size your tag depending on where you will be using it.
Once re-sized I like to Sharpen my tag one final time. You can do this as well or your own preference.
Now all that is left is to save your tag as a PNG file & you have completed this tutorial!!♥
Subscribe to:
Posts (Atom)
About Me
- DitzyDezigns
- New York, United States
- Hiya Everyone! My name is Ronney, I have 3 wonderful teenagers, and have been married to my husband for 20 years. I LOVE to design signatures, tags & avatars, I design with PSP, and have been designing for over 2 1/2 years. I will be not only designing signatures, tags & avatars but will also be writing & posting tutorials as well. I will also be making some templates to share with you all as well. So I hope you enjoy and can use everything I have available on my blog :-) If you ever try any of my tutorials,please send me your completed designs and I would love to showcase it here on my blog!
♥I CT For♥


Blog Hop

Today's Date

Favorite Stores

♥Forums♥


My Pixels


♥My Avatars♥